BRN-Hardware: Difference between revisions
| (4 intermediate revisions by the same user not shown) | |||
| Line 156: | Line 156: | ||
== Development == |
== Development == |
||
To speed-up the development we created a vmware image (Fedora 12 Linux) with the gumstix build environment installed. The image can be downloaded from here: http:// |
To speed-up the development we created a vmware image (Fedora 12 Linux) with the gumstix build environment installed. The image can be downloaded from here: http://www2.informatik.hu-berlin.de/~zubow/gumstix/gumstix_vmware_image.rar |
||
=== Hello World === |
=== Hello World === |
||
| Line 164: | Line 164: | ||
# Init build environment: . extra/profile |
# Init build environment: . extra/profile |
||
# Build brnlogo app: bitbake brnlogo |
# Build brnlogo app: bitbake brnlogo |
||
# Copy the generated brnlogo*.ipk (resides in gumstix/gumstix-oe/tmp/deploy/glibc/ipk/armv5te) to gumstix |
# Copy the generated brnlogo*.ipk (resides in gumstix/gumstix-oe/tmp/deploy/glibc/ipk/armv5te) to gumstix. Note: you also have to install the depend libraries like libpng, libjpg, libfreetype as well as directfb. |
||
# Install application on gumstix with ipkg install brnlogo*.ipk |
# Install application on gumstix with ipkg install brnlogo*.ipk |
||
[[Image:Brnlogogumstix.jpg|center|thumb|250px|BrnLogo on Gumstix Verdex Pro]] |
|||
Latest revision as of 11:21, 22 December 2009
The AR 5212 chipset
Excerpt from Lacage, IEEE 802.11 Rate Adaptation: A Practical Approach, 2004.

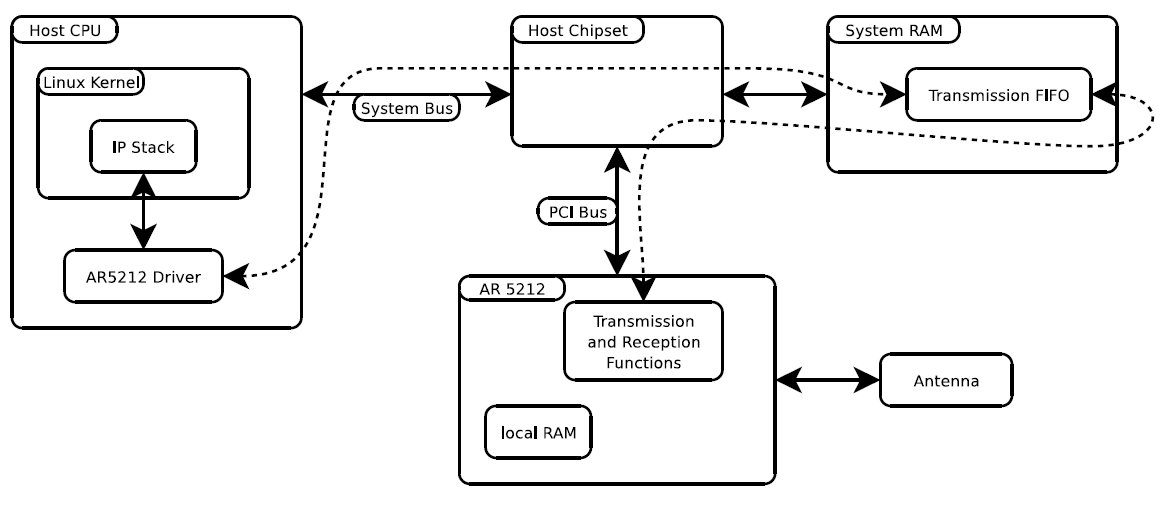
"A complete Linux driver for the AR 5212 chipset is available from the Multiband Atheros Driver for WiFi (MAD-WIFI) project, hosted on SourceForge [6]. This project contains a binary-only Hardware Abstraction Layer (HAL) which hides most of the device-specific registers, a 802.11 MAC implementation imported from the BSD kernel and a Linux AR 5212 driver, heavily inspired by a BSD AR 5212 kernel driver. The HAL exports a very classic interface to the AR 5212 chipset. It allows the user to create up to 9 unbounded FIFOs (First In First Out queue) of transmission descriptors to schedule packets for transmission. Each descriptor contains a status field that holds the transmission status of the descriptor, a pointer, and the size of the data to be transferred. Each transmission descriptor also contains an ordered set of 4 pairs of rate and transmission count fields (r0/c0, r1/c1, r2/c2, r3/c3).
To schedule the transmission of a data buffer, the software driver inserts in one of the FIFOs a properly initialized transmission descriptor. Whenever the wireless medium is available for transmission, the hardware triggers the trans- mission of the descriptor located at the head of the FIFO. To do so, it transfers the descriptor and the data pointed to by the descriptor from the system RAM to its local RAM and then starts the transmission of the data with the rate r0 specified in the descriptor. If this transmission fails, the hardware keeps on trying to send the data with the rate r0, c0 - 1 times. If the transmission keeps on failing, the hardware tries the rate r1, c1 times then the rate r2, c2 times and finally the rate r3, c3 times. When the transmission has failed c0 +c1 +c2 +c3 times, the transmission is abandoned: the status field of the descriptor is updated and it is transferred back from the local RAM to the system RAM. This process is summarized in Figure 8.
When the transmission is finally completed, or finally abandoned, the hardware also reports in the transmission descriptor the number of missed ACKs for the transmission of this descriptor. It is interesting to note that this number indirectly indicates the final transmission rate of the packet as well as the transmission rate of each retry. For example, if c0 = 1, c1 = 1, c2 = 1, and c3 = 1, and if the number of missed ACKs is zero, it means that the transmission completed successfully at the first rate r0. If the number of missed ACKs is 1, it means that the first transmission failed and the second one was completed successfully. If the number of missed ACKs is 3, it means that the first 3 transmissions failed and the fourth one succeeded. Finally, if the number of missed ACKs if 4, it means that all transmissions failed."
Ubiquiti SR9
| IEEE 802.11 Channel | Carrier Frequency | Bandwidth Options |
|---|---|---|
| 3 | 922 MHz | 5/10 MHz |
| 4 | 917 MHz | 5/10/20 MHz |
| 5 | 912 MHz | 5/10/20 MHz |
| 6 | 907 MHz | 5/10 MHz |
Devices' Energy consumption
cpuburn via 'while true; do expr 1 + 1 > /dev/null ; done'
Netgear WGT634U
- idle 7.3W
- cpuburn +0W
- wifi card +0.8-0.9W
Soekris net4826
- idle 4,9W
- cpuburn +2W
- first wifi card +1W
- first and second wifi +1.7W
Devices were powered by a Netgear power supply. The supply's consumption was meassured with ELV Energie Monitor EM 600.
Measuring with Frank's Multimeter G1004.500 directly at the device and an assumed voltage of 16 V.
Soekris net4826
- idle 200mA => 3.2W
- cpuburn +230mA => +3.68W (??)
- first wifi card +50mA => +0.8W
- first and second wifi +100mA => +1.6W
Soekris net4826
Change Serial baudrate
- Enter <Ctrl>+P at BIOS initialization, Enter set ConSpeed=115200 and reboot:
comBIOS ver. 1.28 20050529 Copyright (C) 2000-2005 Soekris Engineering.
net4801
0064 Mbyte Memory CPU Geode 233 Mhz
Pri Mas 64MB ATA Flash Disk LBA 977-4-32 62 Mbyte
Slot Vend Dev ClassRev Cmd Stat CL LT HT Base1 Base2 Int ------------------------------------------------------------------- 0:00:0 1078 0001 06000000 0107 0280 00 00 00 00000000 00000000 0:06:0 100B 0020 02000000 0107 0290 00 3F 00 0000E101 A0000000 10 0:14:0 168C 0013 02000001 0116 0290 08 3C 00 A0010000 00000000 11 0:15:0 168C 0013 02000001 0116 0290 08 3C 00 A0020000 00000000 05 0:18:2 100B 0502 01018001 0005 0280 00 00 00 00000000 00000000 0:19:0 0E11 A0F8 0C031008 0117 0280 08 38 00 A0030000 00000000 09
4 Seconds to automatic boot. Press Ctrl-P for entering Monitor.
comBIOS Monitor. Press ? for help.
> show
ConSpeed = 19200 ConLock = Enabled ConMute = Disabled BIOSentry = Enabled PCIROMS = Enabled PXEBoot = Enabled FLASH = Primary BootDelay = 5 FastBoot = Disabled BootPartition = Disabled BootDrive = 80 81 F0 FF ShowPCI = Enabled Reset = Hard
> set ConSpeed=115200
> reboot
- Log into Linux shell with root/root
- Change Grub config:
pyramid:~# sed -i -e 's/19200/115200/' -e 's#--device=/dev/ttyS0#--unit=0#' /boot/grub/menu.lst
- Change getty config:
pyramid:~# sed -i -e 's/19200/115200/' /etc/inittab
Gumstix Verdex Pro
A detailed description of the gumstix hardware can be found here: http://www.gumstix.com/
Development
To speed-up the development we created a vmware image (Fedora 12 Linux) with the gumstix build environment installed. The image can be downloaded from here: http://www2.informatik.hu-berlin.de/~zubow/gumstix/gumstix_vmware_image.rar
Hello World
- Download and unpack the gumstix vmware image
- Start gumstix vmware image and login as user "zubow" with password "zubow" (the root password is "root")
- Go to gumstix direcotory: cd gumstix/gumstix-oe
- Init build environment: . extra/profile
- Build brnlogo app: bitbake brnlogo
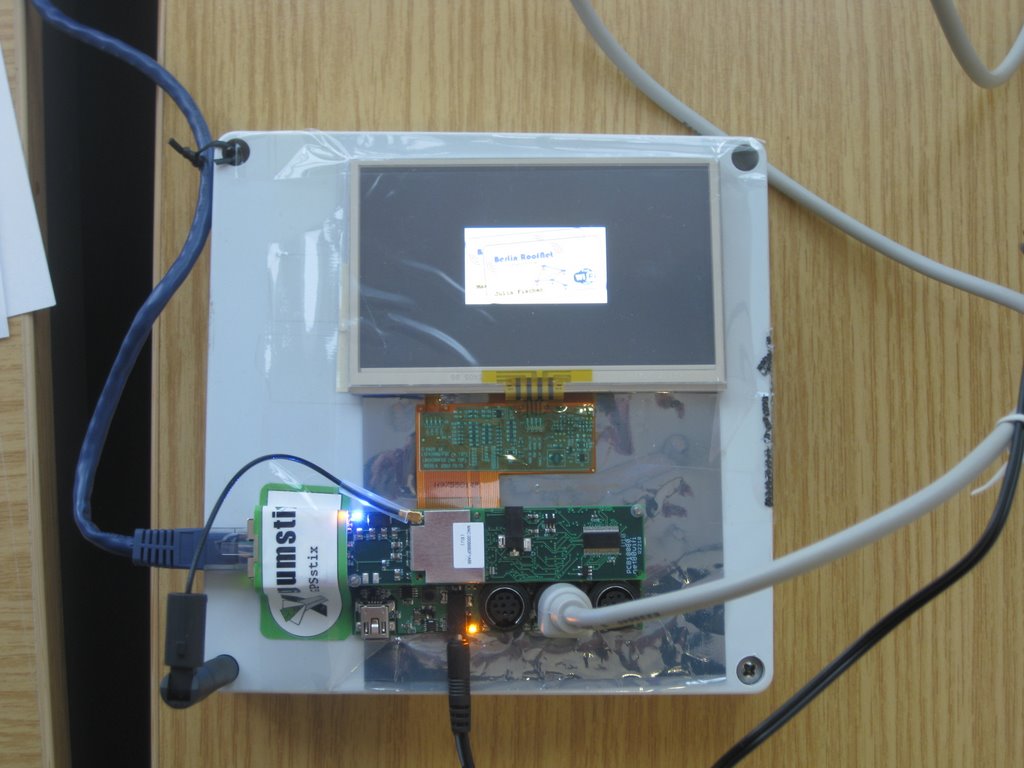
- Copy the generated brnlogo*.ipk (resides in gumstix/gumstix-oe/tmp/deploy/glibc/ipk/armv5te) to gumstix. Note: you also have to install the depend libraries like libpng, libjpg, libfreetype as well as directfb.
- Install application on gumstix with ipkg install brnlogo*.ipk
